Friday, March 24, 2017

Calculating Time

Using EditTime field

Word keeps track of the time you spend editing. You can use this to figure out how to bill your time.

Paul McFedries


See all Topics

Friday, March 10, 2017

Click and Type

Custom fields


It’s often useful to create “click-and-type” text placeholders. The idea is that you click the placeholder, and then you type the required text.

WordRibbon.Tips.net


See all Topics

Saturday, March 04, 2017

Overbar

So far to go

Here's how to inset an overbar or macron, Ā, in Word.

Overbar


See all Topics

Friday, February 24, 2017

Charts and Tables

Q&A

Word 2007-13 handles charts in a different manner than previously. The Excel Charting program is used instead of MSGraph.

Word Ribbon Tips


See all Topics

Thursday, February 16, 2017

Style Sets

Formatting collections

Here is a tutorial about Style sets. You can develop and reuse your own collection of font/attribute choices.

How to use:


See all Topics

Thursday, February 09, 2017

Language Formatting

Spell Check

When you use another language in your document, the spell checker will find errors in the text.
To avoid that, format the words with a language style.

TechRepublic.com


See all Topics

Tuesday, January 31, 2017

Code Copy

Excel to Word

You can select, copy, and paste to put Excel data into a Word document, but this piece of VBA automates to process.


VBAExpress.com


See all Topics

Sunday, January 29, 2017

Drag Query to Word

Drop in

Rather than duplicate the effort, an Access query can be dragged into a Word document.

TechRepublic.com


See all Topics

Saturday, January 28, 2017

Quick Parts

Reusable

Word 2007+ uses the term Quick Parts for Building Blocks.
You can use any kind of content, including pictures, tables, document properties, hyperlinks, and more to create a building block.

Blogs.MSDN.com


See all Topics

Friday, January 20, 2017

Make Templates

How to

This link tells what you need to know to create templates for your own or organizational use.

Office.Microsoft.com


See all Topics

Saturday, January 14, 2017

Line Numbers

Count them all


  1. In Word, click Page Layout (File > Page Setup).

  2. Click Line Numbers.

  3. Choose Line Numbering Options.

  4. Click Line Numbering . . . .

  5. Put a check in the box labeled "Add line numbering."

  6. Set "Start at" to 1, "From text" to "Auto," and "Count by" to 1.

  7. Under "Numbering" select "Restart each page."

  8. Click OK.

  9. Click OK.

  10. Make sure you're looking at Print Layout.


See all Topics

Saturday, January 07, 2017

Saturday, December 31, 2016

Autofit Table

Fit to page

Select the table and right-click.
Scroll to Autofit and then select AutoFit to Window.

Word will automatically adjust the table width to any margin or page orientation changes.

Here are some more table fit suggestions:

TechRepublic.com


See all Topics

Saturday, December 24, 2016

Windows Split

Easy trick

Here's how to split the open window and/or create new windows.

SaraFord


See all Topics

Tuesday, December 20, 2016

Monday, December 19, 2016

Last Doc Shortcut

Back Quick

"A separate shortcut with a special switch that will open the last document that was open in Word."

Last Document


See all Topics

Saturday, December 17, 2016

Move Up the Page

The old fingers walking trick

If you want to move words, paragraphs, bullets, up or down the keyboard shortcut is Shift+Alt + Up/Down/ arrow.


HowtoGeek.com


See all Topics

Friday, December 09, 2016

Multiple-Choice Template

A, B, or C

A template for creating a test paper.
Multiple-choice test or survey kit:

MSDN.com


See all Topics

Friday, November 25, 2016

Thursday, November 17, 2016

Auto Backup

Beep, beep


Automatically creates backups on every save.


AutoHistory: Every time you save your document (and something has changed), a backup (of the history) is created.

AutoHistory


See all Topics

Wednesday, November 09, 2016

Sources

Citations, Bibliographies, Equations, References

When putting together a research paper, one is expected to quote authorities.
Word can make it possible:

Final Paper Time


See all Topics

Tuesday, November 01, 2016

Hidden Data

Secrets revealed

Ed Bott has a discussion on Metadata. That information, such as names and notes, which is hidden in Word documents.

MrBLaw


See all Topics

Monday, October 24, 2016

Word Features

New or reacquaint

2007 came up with a number of new and improved features. Most are the same in 2010-13.
Here's a description of some built in tools.

Beyond the Ribbon


See all Topics

Monday, October 17, 2016

Custom QAT

Access additions


Applications put most of the most-used commands on the Home tab's Ribbon, not everything is there. You may want to add Close, Close All, or Print commands, for example.

In the upper Left corner is the Quick Access Tool bar.

To update the QAT:
Click the down-pointing arrow to the right of the QAT.
Choose any common commands (New, Close, Print, etc.) by checking the option.


See all Topics

Tuesday, October 11, 2016

Merge Formatting Extended

Manipulation

When you merge data into Word, it takes on the formatting of the target document.
This tip allows you the dictate the appearance of merged data.


WordRibbon.Tips.Net


See all Topics

Thursday, October 06, 2016

Command Reference

2003-2007-2010-2016

Those of you that are just now making the switch to the Ribbon world, will find this valuable.

ComputerWorld.com


See all Topics

Tuesday, October 04, 2016

Tips for Office

Suggestions

TechRepublic lists a number of areas that you might explore when training is needed for a new Office version.

Here are a few:
  • LINKS TO TIP SHEETS AND ARTICLES
    "Instead of telling your users to go out to Microsoft.com and do a search, put hyperlinks to the printer-friendly version of tip sheets and articles on your company's main portal page. Providing links to information you know they need will help you cover the training bases. And presenting the links on an internal web site they already use will show your users that it's okay to go outside of their four firewalls to learn something new. Include your favorite hyperlink in your signature line so it goes out in every e-mail you send."
  • ONLINE TRAINING
  • E-LEARNING
  • WEBCASTS
  • VIRTUAL TRAINING
  • MULTILINGUAL SCREENTIPS AND TRANSLATIONS
  • COMMAND REFERENCE GUIDES
  • OFFICE ONLINE AT WORK
10 ways to train your users on Office for free


See all Topics

Wednesday, September 28, 2016

Where's the Template?

Find and/change storage spots


Describes the different template categories and the locations of templates in 2007 & 2010 Office programs. Also describes the registry settings that control where to find your custom templates.

Support.Microsoft.com


See all Topics

Tuesday, September 27, 2016

Character Codes

HTML and ALT+


Here's another table with the codes needed to insert characters that do not appear on the keyboard:

Keyboard Shortcuts


See all Topics

Monday, September 19, 2016

Merge to PDF

Not just MailMerge anymore

Sure, you can create a merged letter and have 30 pages of individualized information.
What now? How do you create separately named documents to, maybe, send as attachments?
Another task might be to convert those 30 docs to PDF. Oh, the hours wasted!

Graham Mayor, a retired newsgroup junkie, offers a solution.
It's a macro that will convert the merged output as individually named doc(x), and/or PDF files.
I've used it, and now wonder what I can do with the time I'm saving.


GMayor.com


See all Topics

Tuesday, September 13, 2016

Merge Access with Word

Database integration


"You can merge Microsoft Office Access 2007+ data with a Word 2007+ document by using the Mail Merge Wizard. This demo shows you how to create a simple form letter and how to troubleshoot problems. You can also use this feature to create address labels or any other type of Word document in which you want to display Access data."
MailMerge Access-Word


See all Topics

Thursday, September 08, 2016

Typography and Word

Shape and display

Here are some suggestions about how to make your text easier to read.

"Ever wonder why some text seems easier to read than others? A few basic formatting changes can make reading text much easier. Factors like line spacing, font choice, font size and margins are key to legibility. "

Office.Microsoft.com


See all Topics

Monday, September 05, 2016

Keyboard and Key Tips

Finger it out


2007-13 apps look different because of the ribbon, but the keyboard can still be used to speed up tasks.
Microsoft has an online courses that may help

After completing this course you will be able to:
Accomplish tasks by using sequential shortcut keys, known as Key Tips, shown on the Ribbon.
Navigate around the Ribbon using the TAB key and arrow keys.
Accomplish tasks by using key combinations — keys you press at the same time - exactly as you've done in previous versions of Office.
Office.Microsoft.com/Training


See all Topics

Friday, September 02, 2016

Forms in Word

With and without code


Data entry forms can be designed and presented using VBA code. Another simpler way to do it is to construct a form directly in the Word document.
"Have you ever been asked to fill out a form in a word processor, only to discover that when you attempted to enter information, the lines on the form moved all over the page? Not to mention that the form was difficult and time-consuming to fill out? Most people don't realize that you can easily create professional-looking forms in Word."
  • Part I: Create professional looking forms in Word

  • Part II: Adding Automation to your Word forms

  • Part III: Learn more about VBA macros to automate your form

  • Part IV: Use custom dialog boxes in your Word forms

  • Part V: Linking your AutoForm to a database
Please Fill Out This Form!

By Dian Chapman at TechTrax

Also:

 Fun with Forms

Cindy Meister

Word on YouTube


See all Topics

Monday, August 22, 2016

Notes from Word

Import it all


One technique that can be used when preparing a PowerPoint show, is to import material from an existing Word Outline.

If the Word document is formatted with Heading styles, Heading 1 will become a new slide and the subsequent headings, 1 through 6 will become bullet points on the slide.

It may be desirable to prepare notes for each slide while developing the Word outline. Notes don't appear on the slide, they are placed on a separate page that can be printed out for the speaker or handed out to the audience.

Bill Dilworth has written a macro that moves information that has been formatted, say at Heading 6, and places it on the notes page:

"This macro outline allows the user to use Word's "Send To PowerPoint" feature, then run this macro to get notes from MS Word to PowerPoint as notes. The macro allows you to set the text level you want to become the notes."

Word Outline to Notes Page in PowerPoint


See all Topics

Thursday, August 18, 2016

Change Insert Picture Target

File location


If you would like to specify the folder Word will default to when you go to Inset>Picture:
  1. From the Tools menu, click Options.

  2. Select the File Locations tab.

  3. Select ClipArt Pictures from the File Types list.

  4. Click the Modify button.

  5. Navigate to the folder you want Word to default to.

  6. Click OK. OK.


In 2007-10, you'll find the entry by
  1. Click on the Office logo

  2. Go to Word Options>Advanced

  3. Scroll down to General

  4. Click the File Locations button


See all Topics

Saturday, August 13, 2016

Stencils are Digital Stencils

Make your own


If you have a document; such as a report or reoccurring newsletter, one way to reduce the production time is to create a template.

These preformatted, boiler plated documents can then be fleshed out without having to reinvent the sardine.

Here are some tutorials to help you along:

AddBalance.com
Template Basics

About.com
Word Templates


See all Topics

Friday, August 12, 2016

Sparklines

Quick graphic reinforcement


A graph or chart can give the reader a visual representation of a great deal of data. Concepts or results can be more easily grasped by a well formatted graphic.

Charts, usually, take up more space in a document than is absolutely required.

Edward Tufte has come up with the concept of Sparklines (Sparklines:Intense, Word-sized Graphics)
.
These are small graphs about the same height and width as common words. They are not out of place in the text of a document.

Sparklines give the reader a snapshot of the data that quickly supports the material being discussed.


See:
Sparklines Tutorial

Bisantz Sparklines


See all Topics

Wednesday, August 10, 2016

Hidden Macro Names and SHortcuts

Revealed


Word has built in macros to perform routine actions such as using the Format Painter to copy formatting.

Rather than trying to guess the name or look up the shortcut keys, use this seldom mentioned trick to find toolbar macro names.

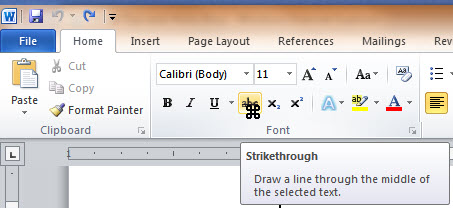
Press the three key combination of Ctrl, Alt, and + (the plus sign on the Numbers keypad).

The mouse pointer changes to a 4-leaf clover.

Click on a toolbar icon. Word will display a form revealing the macro name and the assigned shortcuts.


(It works the same way in 2007+)


See all Topics

Sunday, August 07, 2016

Password Background

Unencrypted

Alan Myrvold has written a background article on how Office handles passwords and what password strength means.

"Word, Excel, and PowerPoint have been able to password protect documents for several versions by setting the 'password to open'. What we felt could be improved was the ability to enforce password strength rules, similar to what may be required when logging into your computer at work."


Enabling password rules for Office 2010+


See all Topics

Thursday, August 04, 2016

REDUCE MISSPELLLINGS

You might be missing typos in tables

If you've ever found typos in a table or list that you're positive you remember spell checking, chances are that the typos are in words that are purposely skipped during the spell check.

By default, SpellChecker ignores words that are all upper-case or that have numbers in them. In most cases, this is probably fine. However, especially with purchased data, you'll occasionally come across tables where everything is capitalized.

Fortunately, you can change the way SpellChecker works so that all words are included.

To do so, run the SpellChecker on a data selection that will cause the Spelling dialog box to be displayed.

Then, click the Options button and clear the Words In UPPERCASE and Words With Numbers check boxes.

Finally, click OK and then Cancel.


See all Topics

Wednesday, August 03, 2016

Find the Word

And Replace


Word has one of the most complete and malleable Find/Replace systems of any application.
Here is a 26 page report on how to use it from Editorium.com.
While your there, sign up for the free newsletter.

Advanced Find and Replace for Microsoft Word

"One of Word's most powerful features, especially for editing, is Find and Replace using wildcards and character codes. This free tutorial (a Word document) will take you step by step through what you need to know. If you don't download anything else here, be sure to get this--and work your way through it. It's well worth the effort."


Editorium.com/Freebies


See all Topics

Friday, July 29, 2016

Spell Check On

Spell check off


You can run Spelling and Grammar checking in Word by clicking on the ABC icon on the Standard toolbar (it's on the Review ribbon in Word 2007), going to Tools> Spelling and Grammar, or just hitting the F7 key.

As you go through the document, you may find areas that you would like to correct. You don't have to close the Spell checker, just click into the document, make the changes and click Resume in the Spell checker dialog box.

You can also flip focus to the document with Ctrl+Tab.
Then go back to checking with Resume.


See all Topics

Thursday, July 21, 2016

Color News

A multidiscipline subject


Here is a study about how color effects a reader's choice of concentration.

It was intended for newspaper publishers, but the same knowledge can be used in Web design, PowerPoint, or any other reporting application. Word and Excel will also benefit.

Color, Contrast, and Dimension in News Design

Color Project

The Poynter Institute is a school for journalists, future journalists, and teachers of journalists.
Poynter.org


See all Topics

Monday, July 11, 2016

Change Code to Comments

Fast solution


When you're testing procedures, you can temporarily convert a block of VBA code to comments that will be ignored during a trial run.

Doing so manually by inserting an apostrophe before each line of code can be a real chore.

To simplify this task,
  1. Open any module in the Visual Basic Editor (VBE)
  2. Choose View >Toolbars>Edit from the menu bar to display the Edit toolbar.
  3. Select the lines of code that you want to turn into comments.
  4. Click the Comment Block button on the Edit toolbar (it's the sixth button in from the right end of the toolbar).
Each line of the selected code is now preceded with an apostrophe. To convert the comments back to executable code, select the appropriate lines and click the Uncomment Block button, which is immediately to the right of the Comment Block button.


See all Topics

Wednesday, July 06, 2016

Thumbnail Views

Little pages


The Thumbnail view can be used to see the layout of a page or to jump from one page to another.

With Word 2003 and 2007, Thumbnail views are available in Normal, Print Layout, Outline, and Reading Layout views. Go to View>Thumbnails to display the Thumbnail pane to the left of your document. In 2007+ go to View>Navigation tab>Show.

Thumbnail versions of your document will appear in a new pane to the left of your current document. Click on a thumbnail page and Word 2003/7 will automatically jump to the selected page.


See all Topics

Friday, July 01, 2016

Calculation Tool in Word

Select and Add


In Excel an instant answer is displayed on the Status bar, when a series of numbers is selected.

If you would like to calculate lists or columns of numbers in Word, look at ToolsCalculate. It will display the answer AND let you paste the result in your document.

ToolsCalculate can be added to a menu or tool bar. Pre-2007, it is available through Tools>Customize.
  1. On the Commands tab, select All Commands in the Category list, then scroll down the Commands list until you find ToolsCalculate.

  2. Drag it to the menu bar and hover the mouse over "Tools" until the Tools menu drops down.

  3. Drop Tools Calculate somewhere on the menu or drop it on a toolbar.

  4. Close the Customize box.
For directions see:
MVPS.org FAQ
  1. Type the numbers you want to calculate, along with the appropriate mathematical operators.

    Word can calculate numbers in a line, in a column or row in a table, or in a column separated from other columns with tabs. Word can also calculate numbers interspersed throughout the text in one or more paragraphs if you include a space on either side of each number.

  2. Select the numbers and operators.

  3. From the Tools menu, choose Calculate.

    Word calculates the result and displays it for a few seconds in the status bar. The result is stored on the Clipboard.

  4. To insert the result into your document, position the insertion point and choose Paste from the Edit menu (CTRL+V) or click the Paste button on the Toolbar.
This is left over from the halcyon days of Word 2.0 when Woody Leonard and Ed Bott were but children.


In 2007-10+,
  1. Click the Office logo
  2. Go to Word Options on the bottom of the box.
  3. Go to Customize.
  4. Select All Commands and find Calculate.
The Calculate icon will now appear on the Quick Access toolbar.


See all Topics

Monday, June 27, 2016

Theses by the Numbers

Colour or Color?


The University of Calgary has a step by step tutorial on how to write a thesis.

  1. Choose a template
  2. Download a template
  3. Guidelines
  4. Styles & their Relevance
  5. Saving your files
  6. Writing - hints & tips
  7. Creating the Front Matter
  8. Assembling Chapters
  9. Page Numbers
  10. Printout & Submission

Included are Word Thesis Templates
Some of the hints may provide you with some help even if you use the letter "U" in a more parsimonious manner.


See all Topics

Wednesday, June 22, 2016

Adjust a Page Border

Fix the box


There is a border around your title page, but the bottom line doesn't print. Usually the reason is that the bottom line (or on a landscape page, the right border) falls within your printer's unprintable area. Here are some suggestions for finding just where that area is and how to adjust your border so that it will print.

  • Find your printer's unprintable area

    Your printer manual may specify the unprintable areas. Inkjet printers, in particular, often have a large unprintable area at the bottom of the page.

    Here's a way to discover them for yourself in Word.

    1. Choose File>Page Setup>Margins tab. Change all four margin settings to 0". Choose OK.

    2. You're told that one or more margins are set outside the printable area of the page. Choose Fix.

    3. Word adjusts the margin settings to your printer's minimum values. Jot down your printer's settings for your future reference, then Cancel the dialog.

  • Adjust the Page Border

    1. Set the insertion point on the page that's bordered, then choose Format>Borders and Shading> Page Border tab. Choose Options.

    2. At the Border and Shading Options dialog, note that the default settings are to have all four borders set to 24 pt (which is 1/3"), and to have Measure from: set to Edge of Page.

    3. To maintain the measurement from the edge of the page, yet move the borders in more toward the center, set the measurements for each of the four margins to 31 pt (the maximum allowed).

      For an alternative setting, set Measure from: to Text. Now the Margin settings measure outward from your text margins. You can set the Margin values anywhere from 0 pt to 31 pt.

    4. Click OK>OK. Use the Standard toolbar's Print Preview tool to evaluate your results.

The border is measured from your text margins, not from your actual text. So, if your bottom border still doesn't print, increase the size of your bottom margin, then adjust the other margins as needed for a balanced appearance.


See all Topics

Friday, June 17, 2016

Unicode is Huge

More symbols and letters


This free download lets you see and select more characters in the Unicode set. The Unicode Character Grid shows all assigned characters and private use characters in Unicode 6+.


BablePad

Here's a blog covering Scripts, Unicode, Character Encoding and BabelStone Stuff
BableStone Blog


See all Topics

Tuesday, June 07, 2016

Format Cleansing

Go back to a simpler time


There can come a time when a document becomes too complicated and the formatting appears more like mud.

For most documents it's a good idea to use styles. These help standardize the formatting for the whole document. But what happens when the paragraph or word doesn't appear in the correct style? While a style is set for each paragraph, it can be overridden by separate formatting for all or part of the paragraph. When you paste in text from another document or web page, it will bring with it the formatting on the source page.

Here's a quick shortcut that will remove all additional formatting from a selection and leave you with normal formatting.

Ctrl+SPACEBAR Remove character formatting

Ctrl+Q Remove paragraph formatting

To clear up the whole document try:

Ctrl+A Then one or both of the shortcuts.

To just get back to Normal Style use:
Ctrl+Shift+N


See all Topics

Sunday, June 05, 2016

Insert Page Numbers

Don't get framed


If you use Insert>Page Numbers to number your document, the character will be contained in a frame.

This can, sometimes, make formatting the Header or Footer difficult.

A more versatile solution is to use Insert>Field.
Look for PAGE and NUMPAGES.

See:
Word.MVPS.org:
How to control the page numbering in a Word document

"Page X of Y" gives wrong numbers

YouTube:
Placing the page number correctly on a landscape page


There is, also, an excellent discussion about how Word handles numbering at the
Microsoft Word MVP FAQ Site


See all Topics

Saturday, May 28, 2016

Declaring Multiple Variables

Declare each one


When setting up a macro in VBA, if you want to declare multiple variables in one line of code, be sure to specify the type for each variable, even if the variables are the same type. Avoid code like the following:

Dim strFName, strLName, strMI As String

In such a case, only the last variable, strMI, is actually declared as a String type. The first two variables are designated by default as Variant data types.

To correctly declare the three variables, you would use the statement:

Dim strFName As String, strLName As String, strMI As String


See all Topics

Saturday, May 21, 2016

Place Marker

If it's broke, fix it


To return to your last edit point, press Shift+F5. For instance, if you have copied and want to return to where you were in order to paste.

Press Shift+F5 again to go to up to the last three edit points, or a fourth time to return to where you started.

In Word 97 you could use this when you first open a document, to go straight back to where you last edited.

There was a change with 2000+ that broke this. The \PrevSel1 bookmark is destroyed when the document is saved.

The Word MVP site has a fix and some other interesting suggestions:

GoBack (Shift+F5) doesn't work in some newly-opened documents

Here are some more bookmarks:
Predefined bookmarks


See all Topics

Friday, May 13, 2016

Format Again by Keyboard

Shortcut to copy


This is one of those tips that you probable skimmed past some time ago.
Rather than using the Format Painter, here's a keyboard shortcut:
  1. Select the text with the formatting you want.
  2. Ctrl+Shift+C.
  3. Select the text to be formatted.
  4. Ctrl+Shift+V will paste the new formatting.
It's the Shift key that adds the functionality to our old friends Copy/Paste.


See all Topics

Thursday, May 05, 2016

Digital Signatures

How do I know it's real?


If you find a need to provide some sort of certification that your document has not been tampered with and is the real thing, you might consider a digital signature.

This Microsoft Support article discusses the process.
What is a digital certificate?

What is a digital signature?

What occurs when I use a digital signature?

What Word files can I sign?

How can I obtain a digital signature?
  • Method 1: Obtain a digital certificate from a certification authority
  • Method 2: Create your own digital certificate
    Description of digital signatures and code

    Here's information for Excel.

    Digital Signatures for Excel


    See all Topics

    Sunday, April 24, 2016

    Protected Spell Checker

    Correct the protected


    Unfortunately, Word's protection feature disables a huge number of important functions, even if you only protect a single section of a document.

    Besides the spellchecker, many other items on the View, Insert, Format, Tools and Table menus are disabled, as well as most items on the Drawing, Database, Visual Basic and Picture toolbars.

    This MS Word MVP FAQ Site article lays out the steps needed to

    Enable the spellchecker in a protected document.

    One of the important elements is "NoReset=True". The act of removing and then re-protecting a document will reset the data without this line.


    In Office 2007+ Protection is found on the Review tab:


    See all Topics

    Monday, April 18, 2016

    May I Comment on Your Balloon?

    Markup stuff


    How to turn off balloons for comments and track changes in Word.

    This article describes how to turn off the balloons that appear for comments and track changes in the right side margin of your Microsoft Word 2002 or Microsoft Office Word 2003 document.

    To turn off or hide the balloons for comments and track changes in the right side margin of a Microsoft Word document, follow these steps:
    1. On the Tools menu, click Options.
    2. On the Track Changes tab, do one of the following: In Word 2003, change the Use Balloons (Print and Web Layout) box to Never.
      • In Word 2002, click to clear the Use Balloons in Print and Web Layout check box.
    3. Click OK to close the Options dialog box.
    Note This process only hides the balloons for comments and track changes. These steps do not remove any changes.

    Frequently Asked Questions About Comments
    Using Tracking and Reviewing Features in Microsoft Word


    See all Topics

    Sunday, April 17, 2016

    VBA Help

    From Microsoft


    Here is a Help reference covering the vagaries of VBA.


    Office VBA Language Reference


    See all Topics

    Monday, April 11, 2016

    Save Clean Document

    Protect your layout


    Sometimes a Word document does not open as well laid out as you intended.

    The page numbers may be off (the numbers may be repeated).

    Formatting marks may be displayed (not a big thing, but not neat).

    This can happen if:

    • You open the document from a Microsoft Outlook e-mail attachment.
    • The Allow starting in Reading Layout option is turned on in Word.
    • The table of contents in the document is three or more pages long.
    • The document was saved in the page layout view.
    Microsoft offers these suggestions to prepare your baby for its best look. When you send a Word document as an e-mail attachment, make sure that you save the document in normal view before you send the document. Turn off reading layout view
    1. Start Word.
    2. On the Tools menu, click Options.
    3. Click the General tab, click to clear the Allow starting in Reading Layout check box, and then click OK.
    Turn off all formatting marks
    1. Start Word.
    2. On the Tools menu, click Options.
    3. Click the View tab, click to deselect the All check box under Formatting marks, and then click OK.
    Manually update all the page numbers
    1. Open the Word document.
    2. Select the table of contents in the document, and then press F9 to update all the page numbers.
    Support.Microsoft.com
    The page numbers in the TOC are incorrectly displayed


    See all Topics

    Thursday, April 07, 2016

    Plain Numbers

    I'd Like to Make It Clear


    Plain Figures is a method of transforming statistical and financial data into figures, tables and graphs that people readily understand.

    Have you ever:
    • squinted your eyes trying to see the numbers in a PowerPoint presentation?

    • scratched your head at a charity leaflet with an indecipherable pie chart titled 'Where your donation goes' ... and set it aside?

    • missed discussion at a meeting because you were busy trying to figure out the figures?

    • put aside a graph or table, thinking "I'm not good with numbers."?

    Then you know how important the clear display of numerical information can be. Common problems People have trouble using numerical information for many reasons. Most commonly, authors don't know:
    • what to include: when unsure what numbers are important, people frequently display them all, overpowering the reader with irrelevance.

    • which format to use: the choice between text and table, table and chart, bar and pie.

    • how to use the technology effectively: computer software generates graphs easily, but the results hide your point behind incomprehensible chartjunk.

    • how to explain the information: selecting the right words for titles, columns and captions.

    Plain Figures is a partnership between Sally Bigwood, located in Wakefield, Yorkshire, UK, and Melissa Spore, who divides her time between Toronto and Saskatoon, Canada. Sally and Melissa are sisters and both have dual citizenship in the United States.
     PlainFigures.com


    See all Topics

    Monday, April 04, 2016

    Echo Document Data

    Enter once — use again


    Enter data in one place in a document and have it repeated elsewhere.

    There comes the time when you need to enter a clients name at the beginning of a document and you know that it will be repeated again many other places.

    Greg Maxey has collected a number of ways to make the task easier.


    Repeating Data


    See all Topics

    Friday, March 18, 2016

    SQL Warning in Word

    Merge Ahead!


    When you open a Word  mail merge main document that is linked to a data source, you may receive the following message:

    Opening this will run the following SQL command:

    SELECT * FROM C:\file_name.log

    Data from your database will be placed in the document. Do you want to continue?


    SQL Warning

    This message helps protect you from unintentionally sending data to a malicious user.
    To suppress this message, you must first create the following registry key:


    1. Open Registry Editor.
    2. Locate, and then click the following registry key:

      HKEY_CURRENT_USER\Software\Microsoft\Office\11.0\Word\Options

      (Use 12.0 for Word 2007)


    3. Click Edit, point to New, and then click DWORD Value.

    4. Under Name, type:

      SQLSecurityCheck

    5. Double-click SQLSecurityCheck.

    6. In the Value data box, type:

      00000000
    See
    Microsoft KB 825765

    Installing Office XP SP3 appears to cause the same problem. For Word 2002 (XP also known as 10.0) you need to place the registry key in: HKEY_CURRENT_USER\Software\Microsoft\Office\10.0\Word\Options

    (Thanks to Brian Livingston at WindowsSecrets.com for pointing the way to a solution)


    See all Topics

    Monday, March 07, 2016

    PowerPoint Bloats Word

    Diet tips


    For various reasons, it can be helpful to send a PowerPoint show to Word. You can have great looking handouts and be able to format the document in ways that are not possible in PowerPoint.

    The problem can be the size of the resultant file.

    One of the easier, more practical ways to slim the doc down is to break the OLE links.
    The size of a Word document may be 20 to 50 times larger than a PowerPoint presentation when you send the presentation to Word.
    1. Start PowerPoint.

    2. On the File menu, point to Send To, and then click Microsoft Office Word.

    3. Click Paste link, and then click OK.

    4. In the resulting Word document, click Links on the Edit menu.

    5. Select all the links that are listed, and then click Break Link.

    6. Click Yes when you are prompted.

    7. Save the Word document.
    When you eliminate the OLE overhead, you can reduce the size of the Word document by 90 percent
    Support.microsoft.com
     Size of Word Document


    See all Topics

    Saturday, March 05, 2016

    Unicode and Other Characters

    Why's A 65?


    Underlying the intriguing prose spread across the monitor screen are numbers and more numbers.

    Joel Spolsky, a New York software developer has written a combination history/tutorial about this numeric-literary liason.

    He calls it:
    "The Absolute Minimum Every Software Developer Absolutely, Positively Must Know About Unicode and Character Sets (No Excuses!)"
    Unicode and Character sets


    See all Topics

    Tuesday, March 01, 2016

    Grammar Rules

    Could Of or Could Have?


    This web site sells a grammar and spell checker, but they also have a compendium of rules for free.

    "Looking for a specific rule to help you in your writing? Trying to decide between two similar words? A grammar checker helps you, but does not tell you why. Grammar checkers also miss many errors, especially those having to do with names, punctuation, sounds, and style.

    Some of you may have a full grammar textbook stored on your disk somewhere, but it is a nuisance to access and use.

    Grammar Slammer takes care of both problems in an easy-to-use format. Grammar Slammer contains the rules and tips you need to write your best and make yourself clear. Grammar Slammer uses the familiar Web Page format to make it easy to find what you are looking for. It even has an easy-to-use glossary to help with those grammatical terms you can't remember. It will truly Slam your Grammar Agony!"

    Grammer Slammer


    (Could of does not exist. Neither do should of, will of, or would of as verbs.)


    See all Topics

    Wednesday, February 24, 2016

    Styles not applied to all texts

    Word makes judgments


    When text is selected, Word must examine the styles that have been applied and determine which to keep and which to overwrite.
    1. Type the following text:

    This line will test how styles and formatting work in Word.


  • Select all the text, and then apply italic formatting.

  • Select all the text, and then apply a style such as Heading 1.

    You notice that italic formatting is not retained.

  • Select all the text, apply the Normal style, and then remove the italic formatting.

  • Select "work in Word" in the text, and then apply the italic formatting.

  • Select all the text, and then apply the Heading 1 style.
  • You notice that the italic formatting is retained.
    'This behavior occurs because Word uses a specific rule to determine whether to apply a style to selected text. According to this rule, Word applies a style depending on the percentage of the selected text that already has formatting applied. For example, if you already applied formatting to less than 50 percent of the selected text, this formatting is retained when you apply a style. If the selected text includes multiple paragraphs, Word first calculates the percentage of text that is formatted in the first paragraph. Then, it examines the paragraphs in the same range. If the formatting that is applied to the text in the paragraphs that follow the first paragraph differs from most of the formatting in the first paragraph, Word does not apply the style to the following paragraphs. Therefore, the formatting is retained in these paragraphs."
    Support.Microsoft.com:
    A style is not applied to all the selected text in Word


    See all Topics

    Friday, February 12, 2016

    Custom Properties

    Use your own


    If you look at Properties on the File menu, you will see a number of entries. You can also create your own custom properties.

    Click the Custom tab and add what you want.


    To insert your own properties in a document, use Insert>Fields

    1. Choose Document Information in the list of Categories
    2. In the list of Field Names, choose DocProperty
    3. Click the Field Codes button
    4. Add the property name to the Field
    5. Click OK
    6. Click OK. Word to inserts the value.


    Here's the "click path" for 2007:


    Also: Word.Tips.Net:
    Creating word custom doc properties from code


    See all Topics

    Wednesday, February 10, 2016

    Who was that font I saw you with last night?

    That was no font, that was my typeface


    You can find the Fonts supplied with some Microsoft products
    Select a product name from the list to get a list of fonts supplied with that product.

    Microsoft's Typography is an interesting site to poke around in.

    Here are some books I use for reference material:
    Words into Type
    by Marjorie E. Skillin, Robert Malcolm Gay ISBN 0139642625

    Stop Stealing Sheep & Find Out How Type Works

    by Erik Spiekermann, E.M Ginger ISBN 0201703394

    The Elements of Typographic Style
    by Robert Bringhurst ISBN 0881791326
    "A font can be defined as a collection of characters with the same style and size. A typeface is the design of the characters regardless of size or style. The terms are used interchangeably today."


    See all Topics

    Friday, February 05, 2016

    Vertical Selection with ALT

    Old trick


    This trick has been around for awhile, but it might be forgotten as new information in the right ear shoves old knowledge out the left.*

    If you hold down the ALT key while selecting in a Word document, you can select a block. This could be a vertical area, such as the prefixes of a list.


    The selection can then be formatted or deleted.


    See all Topics

    Wednesday, February 03, 2016

    Quote Me All You Like

    What the other guy says has weight


    There are sites that give you Bartleby Quotations.

    Gar Reynold has put together a list of some other sites that can help bolster any argument, no mater how specious.


    "In my presentations, I may have several slides which feature a quote from a famous (sometimes not so famous) individual in the field. The quote may be a springboard into the topic or serve as support or reinforcement for the particular point I'm making. A typical Tom Peters presentation at one of his seminars, for example, may include dozens of slides with quotes. 'I say that my conclusions are much more credible when I back them up with great sources,' Tom says."

    PresentationZen.blogs.com:
    Where to get quotations


    "Computers are useless. They can only give you answers."
    Pablo Picasso


    See all Topics

    Saturday, January 23, 2016

    Date an Octothorpe

    Some more of those things I'm sure I used to know


    The keyboard combination of Alt+Shift+D inserts the current date in MS Word and PowerPoint. Ctrl+; (semicolon) does it in Excel and Access.

    If you do not like the date's format, select a different one with Insert>Date and Time and, if you would like to make that permanent, click on the Default button in the lower left corner of the dialog box (in PowerPoint it's in the lower right corner).

    In Excel, Ctrl+Shift +# formats the entry as day-month-year. Ctrl+1 will display the "Format cells" dialog box.

    BTW, the "hash, pound or number" sign # is also called an "octothorpe".

    The person who named it combined Octo for the eight points and Thorpe for James Thorpe.

    "Bell Labs engineer, Don Macpherson, went to instruct their first client, the Mayo Clinic, in the use of the new touch tone phone system. He felt the need for a fresh and unambiguous name for the # symbol. His reasoning that led to the new word was roughly that it had eight points, so ought to start with octo-. He was apparently at that time active in a group that was trying to get the Olympic medals of the athlete Jim Thorpe returned from Sweden, so he decided to add thorpe to the end."

    While we're at it, the "backwards P, Enter mark" is actually named a "pilcrow".

    The pilcrow was used in medieval times to mark a new train of thought, before the convention of using paragraphs was commonplace.

    Also see:
    Geek-speak names for punctuation marks

    Wikipedia:
    Punctuation


    See all Topics

    Sunday, January 17, 2016

    Booklets

    Sized and numbered


    Word has the built-in ability to print booklets with automatically numbered pages.

    "If you don't want to spend money on an add-in, or use VBA; and are willing to do a bit more work yourself, here is the method I use. I've produced booklets up to 100 pages long this way, and it works quite satisfactorily for me."


    Word.MVPS.org:
    Booklet printing

    How-to Geek:
    Create Booklet

    RickySpears.com:
    Microsoft Word Booklet Templates
    "The WordBookletTemplates.zip file contains Microsoft Word templates for 4, 8, 12, 16, 20, 24, 28, and 32 page booklets, with and without page numbers (16 templates in all). I think I developed these with Microsoft Word 97 and I've never made any changes to them. They use a series of text boxes that flow from one to the other to get the text where it is supposed to be in the booklet."


    See all Topics

    Tuesday, January 12, 2016

    Add Captions Programatically

    When the project seems overwhelming


    Faced with a repetitive task, I often have to make the decision, do I do it by hand again and again? Or do I write or find a macro to do the heavy lifting?
    "Have you ever had a document with ten, twenty, or even 100 images, and then as an afterthought decided you wanted to add a caption to each of those images? This is an easy task through the user interface (UI). All you have to do is select each image, one at a time, and choose Insert, then Reference, then Caption. Unfortunately doing this through an image-heavy document is a boring chore and takes up a lot of time.

    Fortunately, the Word object model lets you to apply a caption to a selected object. An add-in that does this for you is only a small chunk of code away. The sample add-in accompanying this article demonstrates how to do this. It also demonstrates many other details about working with shapes and images in Word programmatically that are useful to know about."

    Working with Word Images Programmatically


    See all Topics

    Saturday, January 02, 2016

    Readability Evaluation

    What grade are you?


    Word has a built in tool to determine the level of reading difficulty of a document.

    To see the statistics:
    1. On the Tools menu, click Options, and then click the Spelling & Grammar tab
    2. Select the Check grammar with spelling check box
    3. Select the Show readability statistics check box, and then click OK
    4. On the Standard toolbar, click Spelling and Grammar
    5. In 2007, click the Office button in the upper left corner. Click Word Options. Choose Proofing and When correcting spelling and grammar in Word.
    When Microsoft Word finishes checking spelling and grammar, it displays information about the reading level of the document.

    Each readability score bases its rating on the average number of syllables per word and words per sentence.
    Flesch Reading Ease score Rates text on a 100-point scale; the higher the score, the easier it is to understand the document. For most standard documents, aim for a score of approximately 60 to 70. The formula for the Flesch Reading Ease score is: 206.835 - (1.015 x ASL) - (84.6 x ASW) where: ASL = average sentence length (the number of words divided by the number of sentences) ASW = average number of syllables per word (the number of syllables divided by the number of words)
    Flesch-Kincaid Grade Level score
    Rates text on a U.S. school grade level. For example, a score of 8.0 means that an eighth grader can understand the document. For most documents, aim for a score of approximately 7.0 to 8.0.
    The formula for the Flesch-Kincaid Grade Level score is:
    (.39 x ASL) + (11.8 x ASW) - 15.59
    Readability
    Measuring the reading age of books and other reading matter.

    Wikipedia.com:
     Flesch-Kincaid Readability Test
    Support.Microsoft.com:
    Frequently Asked Questions About Proofing Grammar

    I am working on a law review article dealing with readability. We have found a problem with Microsoft Word's Flesch-Kincaid formula - it does not appear to be accurate. We took a sample text of slightly over 100 words, and ran the check. We then changed the word "report" to statement" (with everything else unchanged) and Word indicated a higher grade level. However, the grade level should not have been affected, since "report" and "statement" are both two-syllable words. It looks like Word is somehow incorporating number of characters in each word into it's Flesch-Kincaid score, which it should not. Any idea what the problem might be?


    You're right, Word handles the formula a little differently.
    BTW, they say the sample s/b 200+ words for reliability.

    and:
    Wikipedia


    See all Topics

    Friday, December 25, 2015

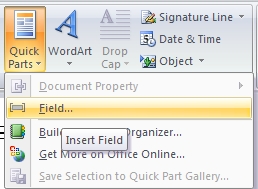
    Insert>Fields

    Tiny code snippets


    Microsoft has included a number of code pieces that you can use without having to haul out the VBA editor. These codes handle such things as page numbers, Table of Contents, Merge data and more.

    "Some 80-plus fields are built into Word that provide information about the file and the user; store, display, and manipulate reference information; and link the document to other applications - all without a bit of code."

    Automate Word Documents with Minimal Code
    By Cindy Meister


    Cindy Meister is a Word MVP.

    She also works with bobbin-lace. Here is a sample of a Honiton lace butterfly.

    Also:

    AddBalance.com:
    Using { Fields } in Microsoft Word

    GMayor.com
    Formatting Word Fields with Switches

    In 2007-10 you can use the =(Formula) field.
    On the Insert tab look for Quick Parts:


    See all Topics

    Saturday, December 12, 2015

    Justify Clean Up

    Minimize white space


    When a document is formatted with columns, the text is often Justified. This can lead to a messy layout of words and letters.
    "When justifying text in Microsoft Word use the hyphenation feature to improve the look of your page. (Without hyphens). . . unnecessary 'white space' is distributed throughout. When hyphenation is turned on the overall typographic color of the page is much more even. To enable this feature in Microsoft Word do the following: After you have justified the columns in your document, choose from the "Tools menu" > Language > then from the dropdown menu, choose "Hyphenation", then choose "Automatically hyphenate document"


    FontBlog:
    Typography Tip #2


    BTW, this goes along with one space after punctuation.
    Bill Hill - There is only one space after a period


    See all Topics

    Friday, December 04, 2015

    SCORE Templates

    Free business advice


    SCORE is a nonprofit organization providing small business advice and training.

    SCORE's 10,500 volunteers have more than 600 business skills. Volunteers share their wisdom and lessons learned in business. Our volunteers are working/retired business owners, executives and corporate leaders.
    • SCORE offers Ask SCORE email advice online.
    • Face-to-face small business counseling at 389 chapter offices.
    • Low-cost workshops at 389 chapter offices nationwide.
    • "How to" articles and business templates
    Here are some of the available templates:
    A Business Plan for a Start-up Business
    Microsoft Word
    A Business Plan for an Established Business
    Microsoft Word
    Bank Loan Request for Small Business
    Microsoft Word
    Break-Even Analysis
    Excel
    Competitive Analysis
    Microsoft Word
    Financial History & Ratios
    Excel
    Loan Amortization Schedule
    Excel
    Opening Day Balance Sheet
    Excel
    Personal Financial Statement
    Excel

    Projected Balance Sheet
    Excel
    Start-up Expenses
    Excel
    4-Year Profit Projection
    Excel
    12-Month Cash Flow Statement
    Excel
    12-Month Profit and Loss Projection
    Excel
    12-Month Sales Forecast
    Excel

    SCORE Template Gallery


    See all Topics

    Friday, November 27, 2015

    Page Numbers

    A baker's dozen of ideas


    Here is a collection of tips about how to display information in Headers and Footers.

    Field codes are demonstrated. Remember that the brackets {} must be inserted with Ctrl+F9, not directly from the key board.

    Here's one suggestion:

    Display the word "more" at the bottom of every page except the last page.

    Insert an "if" field into the footer.

    The field in this case will be a compound entity that consists of two fields nested within a third field.

    { IF { PAGE } = { NUMPAGES } "" "more" }
    1. Position cursor where you want the field.
    2. Press Ctrl+F9 to insert the field braces.
    3. Type the field expression as it appears below, using Ctrl+F9 and arrow keys as needed to keep text within the various braces as you type.
      { IF { PAGE } = { NUMPAGES } "" "more" }
    4. Select the entire expression.
    5. Right-click the selection and choose Toggle Field Codes.
      (or use Alt+F9)
    Headers and footers and page numbers


    See all Topics

    Thursday, November 19, 2015

    Automate Word Tables

    VBA examples and instructions


    The Microsoft Developer's Network has a pretty comprehensive article on programmatically working with data and Word tables.

    "You can look at the world as split into applications that store data (databases) and applications that present information, such as Microsoft Office Word 2003 and Microsoft Office PowerPoint 2003. Increasingly, the end user demands to display database content in documents and presentations.

    While Word does provide some tools for displaying tables from databases in its documents, these are somewhat rudimentary, they require a basic understanding of how the database is built, and using them involves a number of steps. In addition, there may also be security and access issues involved, requiring additional layers of protection.

    The developer is therefore increasingly confronted with the task of transferring data into Word, whether in the form of tables, or as part of the document text. This article considers some of the major aspects of using the Word object model to work with tables."


    • Introduction to Automating Tables
    • Creating Tables Programmatically in Word
    • Populating Word Tables with Data
    • Adding Linking in Word Tables Programmatically
    • Extracting Data from Word Tables Programmatically
    A downloadable document is also available for those of us still addicted to paper. Automating Word Tables for Data Insertion and Extraction.


    See all Topics

    Monday, November 16, 2015

    Kürzungen für jeder

    Accessibility Shortcuts


    Several resources are available to help increase speed and effectiveness for keyboard users. Here are keyboard shortcuts for leading Microsoft products that help save time and effort and provide an essential tool for some people with mobility impairments.

    • Internet Explorer (11/10/9/8/7/6)
    • Office (2013/2010/2007/2003)
    • PowerPoint
    • Publisher
    • Windows (8/7/Vista/2003/XP/2000)
    • Windows Media Player
    Microsoft.com Keyboard Assistance.


    See all Topics

    Thursday, November 12, 2015

    Mail Merge Page Printing

    One big page


    After completing a merge to a new document, the status bar may indicate that the insertion point is located on page 1 of 38 pages. This is a bit of mis-information.

    If you turn on Show/Hide and look at the merged document in Normal view, you'll see that the merged document has section breaks rather than page breaks.

    If you try to print what should be Page 1, the entire document will print.

    To print just the first section, use "s1" in the Print dialog box.


    Another way to handle it is to go to Edit>Replace and replace

    "^b" (section break)

    With

    "^m" (manual page break)


    From Office.Microsoft.com:
    In the Pages box, type instructions to print one of the following:

    Noncontiguous pages

    Type the page numbers with commas between them. Type the range of pages with a hyphen between the starting and ending numbers in the range. For example, to print pages 2, 4, 5, 6, and 8, type 2,4-6,8
    A range of pages within a section

    Type p page number s section number. For example, to print pages 5 through 7 in section 3, type p5s3-p7s3
    An entire section

    Type s section number. For example, type s3
    Noncontiguous sections

    Type the section numbers with commas between them. For example, type s3,s5
    A range of pages across sections

    Type a range of page numbers and the sections that contain them with a hyphen between the starting and ending numbers in the range. For example, type p2s2-p3s5


    See all Topics

    Wednesday, November 11, 2015

    Graphics from the '50s

    Remember it the way you want to


    Original fifties clipart? Just in time for the holidays, some Ozzie and Harriet style pics.


    "Most communities in the fifties had small town print shops that doubled as printers of local news and advertising papers. These printers could not afford graphic artists so they used stock clipart supplied by large companies who distributed common graphics for use in advertising sections of the papers. They were provided for the printer in lots of categories to meet any advertiser's needs."

    Retrographix.com


    See all Topics

    Thursday, November 05, 2015

    Merge Pictures

    Different picture to every letter in a mail merge


    A variation of this technique could also be used with an IF statement to display different pictures based on some criteria, such as Zip code.
    1. Open the Excel worksheet that you use as the mail merge data source.

    2. Insert a new column that has a column heading such as Picture.

    3. For each row of the Excel worksheet, insert in the Picture column the path and the file name of the picture that you want to use for that record of the data source. Additionally, enclose the path and the file name in quotation marks (").

      For example, copy the path and the file name of the picture in Windows Explorer. Then, paste the path and file name into the Excel worksheet.

      Note The path and the file name of each picture in the Picture column will appear similar to the following example:


      "C:\Documents and Settings\username\My Documents\My Pictures\foldername\filename.jpg"

    4. On the Edit menu, click Replace. Then, replace each instance of a single slash mark (\) with double slash marks (\\) in each path.

      For example, each path should now look similar to the following example:

      "C:\\Documents and Settings\\username\\My Documents\\My Pictures\\foldername\\filename.jpg"

    5. Save and then close the Excel worksheet. Then, quit Excel.
    In Word, follow these steps:
    1. Open the mail merge main document.

    2. If the Excel data source is not attached, attach the data source. To do this, go to Step 3 of 6 in the Mail Merge task pane. Click Browse, and then attach the Excel data source.

    3. Click Next: Write your letter.

    4. In the mail merge main document, move the insertion point to the location where you want the picture to appear.

    5. On the Insert menu, click Field.

    6. In the Field dialog box, click IncludePicture under Field names, and then click OK.

      Note You may receive the following error message:

      Error! Filename not specified

    7. Press ALT+F9 to display the field codes in the mail merge main document. You will see a field that is similar to the following field:

      { INCLUDEPICTURE \* MERGEFORMAT }

    8. Move the insertion point into the field immediately following INCLUDEPICTURE.

    9. Press the SPACEBAR, and then click More items on the Mail Merge task pane.

    10. In the Insert Merge Field dialog box, click the picture merge field, such as Picture, and then click Insert.

    11. Click Close to close the Insert Merge Field dialog box.

      The INCLUDEPICTURE field should now look similar to the following field:

      { INCLUDEPICTURE { MERGEFIELD "Picture" } \* MERGEFORMAT }

    12. Press ALT+F9 to hide the field codes in the mail merge main


    13. Click Next: Preview your letters.


    14. Click Next: Complete the merge.

    15. In the Mail Merge task pane, click Edit individual letters.

    16. In the Merge to New Document dialog box, click OK.

    17. On the Edit menu in the merged document, click Select All.

    18. Press F9 to update the fields in the merged document.
      (Word mail merges are not dynamic)

    19. To print your letters from the merged document, click Print on the File menu. Each printed letter will contain the picture that you specified in the Excel data source.
    Knowledgebase #909132:
    Different picture to every letter in a mail merge


    See all Topics

    Saturday, October 31, 2015

    Almost All You Need to Know

    Collection of Word explanations


    Shauna Kelly is a Microsoft Word MVP.

    She has compiled a gathering of important Word how to's and whys.
    For new users of Microsoft Word
    Basic concepts - Introduction
    Styles in Microsoft Word
    Tips for understanding styles
    Formatting
    How the Styles and Formatting pane works
    Numbering, Bullets, Headings, Outlines
    How to control bullets
    Templates
    What is the relationship between a Word document and its template?
    Layout
    How to keep a figure on the same page as its caption
    Sharing Microsoft Word documents
    What happens when I send my document to someone else?


    Making the most of Word in your business:
    Microsoft Word FAQ


    See all Topics

    Saturday, October 24, 2015

    Clip Art Gallery

    Sprinkle carefully


    Judicious use of Clip art can spice up a document. Here's an article about how to customize existing pictures including:
    • Display clip-related toolbars
    • Customizing your clip art
    • Cropping
    • Sizing
    • Adding text wrapping
    • Blurring
    • Rotating and flipping
    • Adding a drop shadow
    Edit clip art in Word


    Halloween clips


    See all Topics

    Thursday, October 22, 2015

    Split View

    Top and bottom


    If you need to look at more than one part of a document at once, consider splitting the window.

    To split the current window, just go to Window>Split from the main menu.
    (View>Split in 2007)

    Another way is to use the splitter control between the file tab channel and the scroll bar for the doc.


    To create new windows for the same document, just go to Window>New Window and create as many views on the same document as you would like. (View>New Window in 2007)


    Split Screen Feature - Word 2013


    See all Topics

    Friday, October 02, 2015

    Background Printing

    Yes, you can!


    Remember back in the old days of Word before 2003?

    We would demonstrate how a background color or theme could be applied to a document. Then say something like, "But you can only see it on the screen."

    That changed with 2003 and '07.

    Go to Tools>Options.
    (Word 2007+
    Click the Microsoft Office Button, and then click Word Options.On the Display menu, click to select the Print background colors and images check box under Printing Options, and then click OK.)

    Go to the Print tab and on the Include with document section,
    put a check next to "Background colors and images" and click OK.


    Now when you apply Theme formatting it will be printed as well as the text.
    (A caveat might be that on a black and white printer, the result can appear muddy)

    To apply a theme to a document go to Format>Theme. These are the same themes (colors, graphics and fonts) used in FrontPage.

    This Knowledgebase article also offers suggestions on how to get around the problem in Word 2002.
    Word 2003 or Word 2002 document that includes a background


    See all Topics